You Can Make You Own Halloween Snapchat Lens To Customize Spooky Stories
October is here and that means it's time for spooky Snaps. While Snapchat usually has quite a few Halloween Lenses to choose from, you can easily make your own Lens. If you're ready to get creative, here's how to make a Snapchat Lens for Halloween using Snapchat's Lens Studio.
The process of customizing a Lens is actually pretty simple. To get started, download the latest version of Snapchat's Lens Studio, which requires a Windows 10 (64 bit) or MacOS 10.13+ operating system. The software is about one gigabyte, so make sure you have enough space on your computer. When you first launch Lens Studio, you'll see a Birthday Lens Tutorial for beginners at the top of the main page. To get a feel for how it works, you can try that out first.
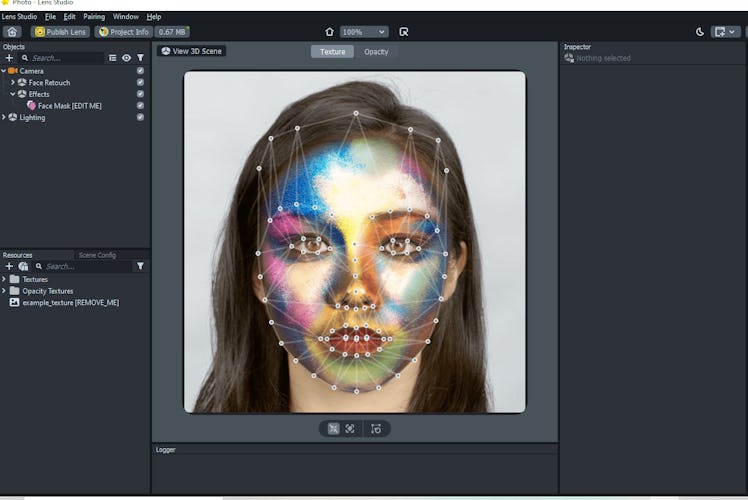
The easiest way to start creating a Lens is by using a premade template. To find it from the home page, click on the "Templates" option on the upper left of the screen. Then, narrow your search by clicking on the "Skills level" drop-down menu at the top right, and select "Beginner." Next, look for a template you want. To keep it simple, you can try the "Photo" template, which lets you apply any photo onto your face as a Lens. When you select a template, it will open up as a new project in Lens Studio. To your left, find the "Objects" panel and select the "Face Mask [EDIT ME]" underneath the Effects tab.
With the template, look to the Inspector panel to the right of the editor, and find where it says "Material" underneath the Face Mask editor, and this is where you'll upload a photo of what you’d like to use for your Snapchat Lens. For example, I chose a pumpkin for Halloween, but you could do any type of photo you’d like. Click the “Default” option next to Material. Then you’ll see a new window with a plus sign (+) in the top left corner. Then click the option that says “+ From Files.” Choose one of your photos from your computer and upload it. Next, click on "Texture," to find the upload in the list. Select the upload and it will appear as the new texture on your mask.
On my first try, I went with a carved pumpkin face mask by uploading a photo I got for free. You can use a picture from a stock image website like Pixabay or Unsplash to create a mask, or choose a photo you’ve taken. (Both services provide images which are made to be used freely, but make sure to check out Snapchat's Lens guidelines if you plan to add additions like music.)
You can change the color of your Lens or how it will appear in the Inspector panel by using the "Blend" drop-down menu. Play around with the different blends they have if you want to alter your picture. You can also change your eye color pretty easily, by using the Inspector panel. To do so, click the button at the bottom of the panel that says "Add Component." Then select "Eye Color," and choose a color from the opened panel. If you need to adjust how the Lens appears on your face, you can easily stretch the face with the grid dots.
Once you're satisfied with how it looks, you can preview it on Snapchat. First, open your Snapchat app. Then in Lens Studio, click the "Preview in Snapchat" button. Next, select "Send Lens to Device," and scan the Snap code on the screen. A banner will pop up on your phone's app. Tap the banner and you'll see what the Lens looks like on Snapchat.
To save the Lens as a finished project, go back to Lens Studio and select Publish Lens at the top left. Add tags, click submit, and you'll find it on the My Lenses page in a couple of minutes. You can upload it to Snapchat or choose "Do not promote" if you don't want other Snapchatters using the Lens.
If at any point you feel you've missed a step, Lens Studio's beginner guide is a great place to look for help. You can also access a guide for each template when you click “Learn More” on the template, and then click “Video and Guide.” Once you've spent some time playing around with Lens Studio's simple features, you can play around with other options and let your creativity run wild.
This article was originally published on