My Teeth Got The A-List Treatment With This Custom Whitening System
Teeth whitening and I go way back — there are loads of products I’ve painted on, squished over my teeth (looking at you, strips), and brushed with. One time in high school I had the genius idea to use a paint-on gel under my retainers, overnight. I was shocked at the dazzling white I saw the next day... and also the searing pain when I ate or drank anything. Never again. Fast forward to coming across Smile Brilliant’s teeth whitening kit. With custom-fit trays and — importantly for me — desensitizing gel, I had high hopes of comfortably recapturing that sparkling white. To make my teeth extra happy, I got a night guard too.
What Makes Smile Brilliant Unique?
When it comes to at-home whitening, peroxide is the name of the game (and is the ingredient in most any OTC teeth whitening product). You may have experienced the pros and cons of what’s available at the drugstore — gel doesn’t stay on long enough, strips slip around, and toothpaste doesn’t have significant results.
The people behind Smile Brilliant saw that and developed a system that keeps that ever-important peroxide where it needs to be — against your teeth — with trays custom-made to fit your specific pearly whites.
How Does It Work?
The process is pretty straightforward. When you order a teeth whitening kit, Smile Brilliant sends you materials to make dental impressions, you make them, then send them back in the prepaid envelope. When the impressions are received, Smile Brilliant creates your fancy custom teeth trays and sends them right over.
Making The Impressions
I was a little anxious about my at-home dentist skills, but luckily the whitening kit comes with extra material — and you can email customer support with photos of your impressions (they recommend it!). They’ll let you know whether they work, and if so, which ones to send in. I found it helpful to front-load the tray a bit, as my first attempt sent lots of paste to the roof of my mouth where it’s not so useful.
Using The System
When I got my whitening kit I somehow blazed past the instruction sheet that’s in the box with the gel and followed the simplified version on the box. Oops! I did learn that less is definitely more — these trays fit neatly against the teeth and the thick line of gel I put in squirted up over the tray and into my mouth. After 30 minutes, lesson learned (the gel isn’t super tasty). There are 3-4 applications per tube.
The next time, I followed the full instructions. They are: brush teeth with just water, dry teeth, slip on the tray (with a thin line of gel). Wear them for 30 mins to three hours. Then brush teeth with toothpaste, follow with desensitizing gel for 15-20 minutes, then preferably go to sleep. I found two hours is my sweet spot — that’s basically how long I ever want to go without eating snacks.
The Results
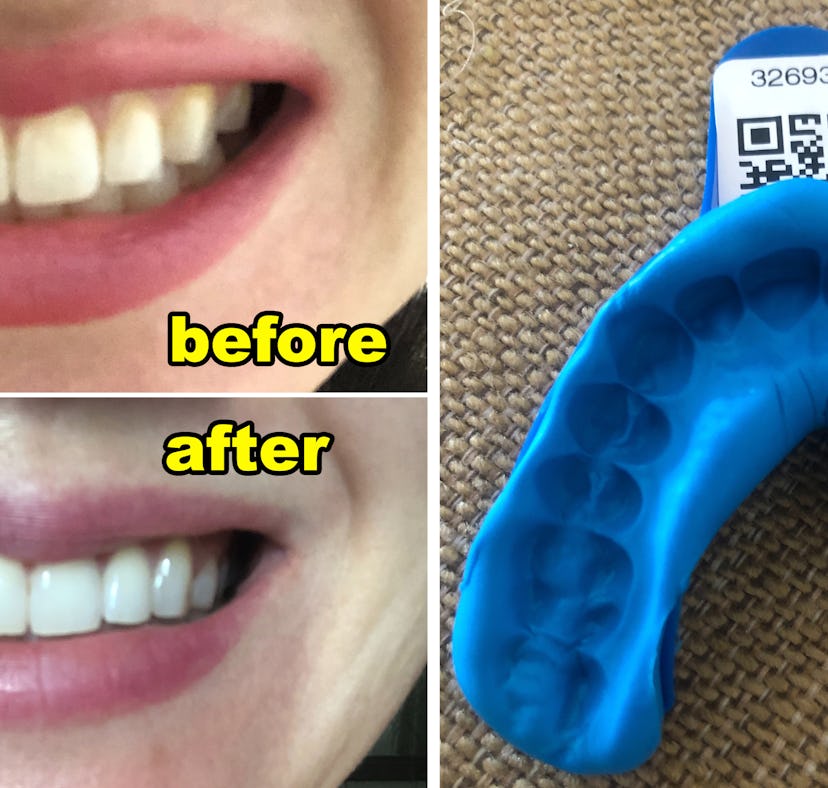
I’ve used the whitening kit five times thus far, and noticed a solid difference. I experienced a touch of sensitivity (though nothing like my high school mishap) and found it worked best for me to skip a day between sessions. This sometimes became more than a day because, life, but I tracked my progress and the proof is in the pudding.
An excellent and consistent photographer I am not, and my lipstick and lighting are different, but I think you can see what I mean. I got the system for non-sensitive teeth with average staining, and there are ones available for heavy and light stains as well. They also have a system for sensitive teeth, for light, average, and heavy staining.
The price ranges from $149 to $189 depending on the type you get — whichever way you go, it’s a good deal cheaper than a dentist-chair whitening.
Night Guards
Lest I leave out the last bit of Smile Brilliant’s wares I indulged in, I got a night guard too. At one point in the past, my sister made a recording of me sleeping because my teeth-grinding was so wild. I was blown away by how harsh it sounded. Though no one is making secret night recordings of me these days, I do tend to carry tension in my jaw, and enjoy protecting my now very white teeth overnight.
The guard is a bit thicker than the whitening tray but is flexible and comfortable, and does its job. The process of getting the guard is the same as the whitening trays, and the price ranges from $99 for one to $149 for four. You can reorder as many times as you like once you’re on file.
Night guard in the center
Final Thoughts
Smile Brilliant’s system is simple and effective. Once you get the hang of the process and how much gel to use, it’s pretty breezy and accomplishes the goal. It’s now been a week since I did the five treatments, and my teeth are still looking nice and white. I’ll probably do 2-3 treatments every couple of months to maintain the brilliant white shade, and if I have an event (or anything that involves photos) I’ll do a session or two in the days before to ensure I’m at my sparkliest. The teeth whitening kit from Smile Brilliant has definitely earned a place in my medicine cabinet.
Studies referenced:
Carey, Clifton M., BA, MS, PhD, Professor. (2014) Tooth Whitening: What We Now Know. J Evid Based Dent Prac., https://www.ncbi.nlm.nih.gov/pmc/articles/PMC4058574/
This article was originally published on