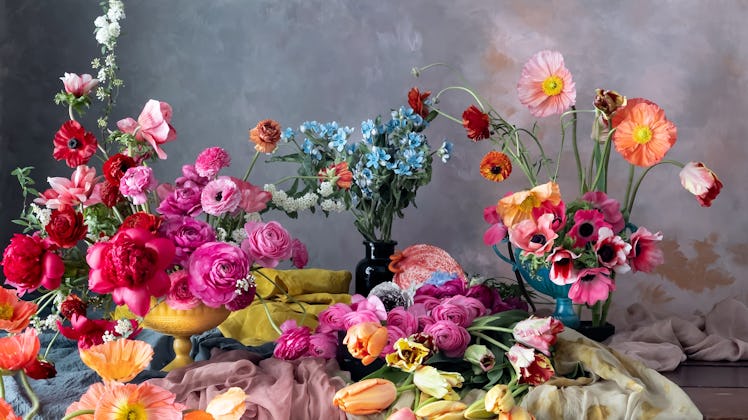
Take The Perfect Flower Pic Every Time With These Super Simple iPhone Camera Tips
Sometimes it seems like no matter what you do, you can't fully capture how eye-catching a floral arrangement is. Whether your boo or BFF sent you a bouquet or you decided to treat yo’ self, it isn’t always easy to capture the beauty of a bouquet with your phone's camera. Thankfully, Apple partnered with a seasoned photographer to give you these iPhone tips for taking pictures of flowers, so you can take envy-worthy snaps of your arrangements in no time.
To get started taking gorgeous pictures of flowers, all you’ll need is your iPhone and these tips from photographer Nathan Underwood of Tulipina, a New York-based floral design studio run by Kiana Underwood, founder and CEO. While Tulipina has some jaw-dropping floral arrangements fit for the most glamorous occasions, the basics of taking sweet photos of ~any~ floral arrangement are the same. Most of the tips are iPhone-specific, but if you don't have one, you can try some of the tips with similar camera features on your own device.
Underwood outlined some instructions for capturing floral pics that will be the envy of Instagram, and the best part is, they’re pretty simple. Once you’ve got your bouquet, grab your iPhone, and follow the tips below.
1. Stage Your Photo
According to Underwood, “Everything begins with lighting.” Ideally, you should find a spot indoors with natural lighting, 3-feet or less from a window. (Pro tip: The window doesn't have to be very large to get enough light, so don't stress if you're snapping near a smaller window.) If you’re taking photos outdoors, he suggests finding a spot with consistent shade to avoid uneven lighting.
Next, you want to consider your photo's background. Underwood says a neutral background is the best choice (especially blues or grays), and you should avoid using distracting backdrops, such as bricks or stripes, or any area with wall features that could take away from the subject, aka your gorg flowers.
2. Frame Your Photo
“While you can crop later, getting a correctly framed shot from the right angle and perspective is critical for ensuring that you have the best photo to work with,” Underwood explained for Apple.
When you’re using an iPhone, it’s best to choose the lens with the closest focal distance, per Underwood. Focal distance is simply the distance between the lens of the camera and the image sensor, and will affect the how much of the scene you’re capturing and how it’s magnified. For example, if you’re using an iPhone 12 or iPhone 12 mini, you would select a Wide camera (1x). On the iPhone 12 Pro models, you'll use the Telephoto camera, which is 2x and 2.5x on iPhone 12 Pro and 12 Pro Max, respectively.
For the best result, place your floral arrangement in the center of the frame. Underwood recommends holding your iPhone at a slight downward angle when capturing the picture to get both the vase and the depth of the flowers in the shot.
3. Use Portrait Mode
If you’re new to still-life photography, or plan to post ASAP after capturing and editing the photo, Underwood suggests using your iPhone’s Portrait mode. Anyone who has an iPhone 7 Plus or later will be able to use Portrait Mode.
Because Portrait mode captures more depth in the picture, the pro photographer says it gives you plenty of options when using the Photos app for editing.
4. Edit In The Photos App
Using the Photos app on your iPhone, you can follow Underwood's easy edits. He adjusts different parts of the photo, like crop/aspect ratio, exposure, saturation, and warmth, to get his desired result.
You can find the tools when you tap "Edit" when you're on the picture you want to edit. Then, tap the dial icon at the bottom left of the screen, and you’ll be able to swipe through editing options.
Next, follow Underwood's steps in Photos:
- Set the photo to an 8x10 aspect ratio. Then, crop your photo so that the flowers fill the entire frame evenly.
- Using the exposure tool, slightly increase your photo’s exposure to make the floral arrangement pop.
- Next, increase the saturation a small amount (somewhere under 10) to make the colors of your bouquet stand out even more.
- Lastly, use the warmth tool to make your image a bit cooler, which means pulling it back into the negatives. Underwood's pro tip is to match the color you see on the screen to the color you see when you look at your flowers.
5. Use ProRAW
If you have the iPhone 12 Pro or the iPhone 12 Pro Max, you may want to try Apple ProRAW, which is a pro photography mode that captures the most information possible for the image. With ProRAW, you can go deeper into the editing process and use a third-party editing application such as Adobe Lightroom or Photoshop.
To start using ProRAW, you’ll need to enable it on your iPhone 12 Pro, by going to Settings > Camera > Formats. Once there, turn on Apple ProRAW.
If you opt to use this camera mode, Underwood recommends editing using Adobe Lightroom and make similar edits to the ones you’d make using Photos. (A subscription to Adobe Lightroom starts at $9.99 per month after a 7-day free trial.) He also suggests using the Radial Filter Tool, which lets you make specific edits to a small area, such as targeting the exposure or saturation of a single flower in the picture.
Of course, the more professional edits are totally optional, and if you are only down to use your phone, you can still get flower pics that will win you all the double-taps on the 'Gram.